Saturday, March 27, 2010

Tutorial: Converting a Pullover into a Cardigan Using Fabric Binding

When I was growing up in San Francisco we lived near a train track. While walking home with my sister through the tracks, my grandmother found a table, and the two of them carried it back to our house. This is a totally characteristic event in my family. Finding free stuff is always a cause for celebration, and an old woman and a 10-year old girl carrying a table down the street is seen as a minor inconvenience. It was one of those wooden 40s tables with the drop-leafs on two sides. My mother stripped and refinished it, and we used that table for many years.

Finding something with potential, dragging it home, and making it close to perfect can be an art form. I keep practicing it, anyway, and someday I’ll be a master.


I bought this turtleneck sweater at the thrift store because I like the color, and because it’s 50% wool. However, I find it increasingly hard to wear things that are tight around the neck. I think it may be an age thing, but this clearly wasn’t going to work. I put the sweater aside, thinking I’d put it into the donation pile, but then I started to see some possibilities in the sweater I hadn’t considered at first. I decided to convert it into a cardigan.


The first step may be the scariest, but fear not, you are the master of your project, and if you're like me, and only paid $3 for your sweater, you can be bold with it. Mark the center line of your sweater with chalk or with a sliver of soap. If you're feeling really rebellious, make it an off-center line. Machine stitch along both sides of the line with a narrow zig zag, then cut between the stitched lined with a sharp scissors.

Make some continuous fabric bias tape. Here is a handy tutorial if you've never done this. In my mind, the fabric you choose can really make your project stand out. I had a fat quarter of this nice pink and brown floral that was perfect. I made 2" wide binding, and it made about double the amount of bias binding I needed for this sweater. You can make your binding wider or narrower, as you like.

Iron your binding in half length-wise just so you have a reference point. Match raw edges of your binding and the wrong side of one half of your sweater, and sew with a straight stitch. I used a 1/4" seam.

Flip to the right side, and fold the corners neatly, especially at the neck edge, since the inside edge is going to show. Fold the free edge up to the center crease.

Fold the binding to the right side so that the sweater edge is completely encased by the binding. Top stitch on the right side. You can see that the binding is wider on the right side than the wrong side. Carefully press the stitched binding so the fold line is no longer visible. If you want it to be even on both sides, use a wider seam allowance when you first attach the binding. Repeat for the other edge of the sweater opening.

I added hooks and eyes to the inside of the sweater opening, and these three vintage buttons are purely for decoration.


I've worn this sweater a few times already. I feel very chic, and clever to boot.

If you want more ideas: Craftzine has a great tutorial for cardiganizing a pullover in which you crochet a new buttonband.

Wardrobe Refashion is a blog that has a constant stream of re-fashioning ideas.

Sister Diane at Craftypod has done an excellent series of podcasts on the concept of "Free" in the on-line crafting community. She also has a great list of links to related discussions. Check out her earlier podcast and show notes as well, where she describes her own experience providing free craft content on the web.

Sunday, March 21, 2010

Granny Squares


The closest thing I have to a crafting tradition in my family is the granny square afghans my mother and aunts crocheted while I was growing up. Sometime when I was in my early teens, my mother and aunts started getting together weekly for what they called their “sewing club.” My mother has six sisters, who all participated, except for Auntie Jo, who liked to wear sunglasses inside, and who was rarely without a cigarette hanging from her mouth. I don’t think the sewing club was quite her thing. Instead, my Auntie Helen, an aunt by marriage, joined the club.

They met on Wednesday nights after dinner, and took turns meeting at each other’s houses. The hostess was expected to provide tea and a dessert. Of course the real purpose of the sewing club was to get together and visit, which is remarkable to me in retrospect, because they spoke to each other continuously on the phone and in person. It was always someone’s birthday in my family, so there was a regular schedule of parties, and of course we got together for holidays. My Auntie Lu would often stop to have coffee with my mother after she’d dropped her kids at school, and before she had to show up for her part time job wrapping packages downtown at the Emporium. She’d arrive with her coat thrown hastily over her nightgown. However, Auntie Lu had to stop driving around town in this attire after her car broke down one morning. Fortunately, she was within walking distance of Auntie Helen’s, but she had to make the walk, as she later reported, sin calzones, without underpants, as she had again rushed out of the house wearing nightgown, coat, slippers, and nothing else.

When they first met for the sewing club, the aunts would bring pants to hem, or other mending. Auntie Nena was the first one who crocheted, and she quickly taught the others. Eventually, the granny square afghan, in its classic incarnation with black-bordered multicolored squares, became the sewing club’s official project.

The aunts swapped brightly colored acrylic yarns so that everyone had the maximum number of colors in their granny squares. They carefully chose what colors to contrast between rounds. They shared extra aluminum crochet hooks in size E with those who couldn’t find theirs. I don’t remember my mother working on her granny squares outside of sewing club meetings, and my aunts probably didn’t either, which is why the afghans seem to have been completed over many years. Eventually everyone finished one, and except for Auntie Nena, the original crocheter in the group, I don’t think anyone continued to crochet after the granny square afghans were done. Eventually the group disbanded. My aunt Helen separated from my uncle, my parents moved out of the city when my father’s plant relocated. But everyone had a granny square afghan proudly displayed in her home. It was an accomplishment they’d made together, as a group, as sisters.


The granny square afghan appears to be trendy again. Or maybe it’s that its trendiness has been acknowledged by a new generation. Check out the work of Attic24 . There are some remarkable examples in Flickr groups Attic24 Inspired and Crocheting Sunburst. As always, careful color selection is the key to the granny square.


I was inspired by a project in this post on Attic24, and by the sewing club afghans, to make a granny square scarf. It was fun to make, choosing from a selection of bright scraps. I got Allie to model it for me. She has the panache to make it look elegant. I’m going to wear it with my jean jacket now that the weather has been warmer.


The granny square captures some of the best parts of the crafting experience. It’s best executed when both yarn and experience are shared with others. It’s being fostered today in virtual sewing clubs all over the world.

Saturday, March 13, 2010

Progress Report and Mail Call


I had some time this week to work on my piece for the AAQ contest. I love it when I can take an hour or two first thing in the morning and sit by the window and do some hand work. It's the best way for me to begin the day. I've added more roses and some white sequins and French knots, which I think of as stars. I've also added more beads.


In the evening, I'm working on my Faire Isle vest. I'm getting closer to the point at which I start the steeks for the armholes and the v-neck. I'm feeling very confident with color work knitting at this point, and I'm going along at a pretty good clip. I won't make the deadline of finishing this before my mom's birthday next week, but she'll get an IOU and a small consolation shawl.

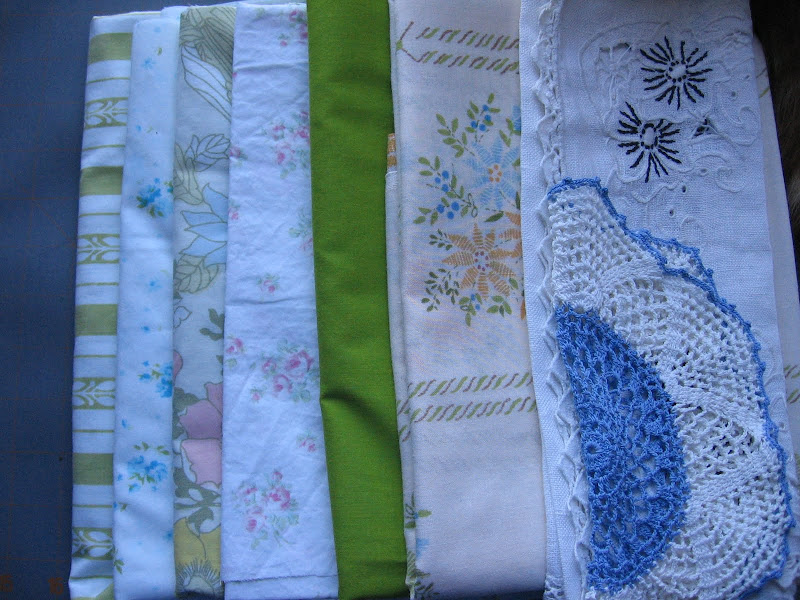
I've had great mail over the past couple of weeks. First Beth sent me these lovely vintage linens. She an I share the passion for old fabrics and I really love the avocado green in this selection. I'm thinking of making aprons from my now-expanded stash of pretties. Check out Beth's blog, Love, Laugh, Quilt, where she posts a lot of scrappy and improvisational quilts.


Sue sent me this really cute ATC of my cats called "Cleo and Louie in the Garden." It's so cheerful and fun. I'm keeping it on my desk where it keeps me in a good mood while a grade midterms. Sue is making a series of beaded ornaments this year, and she makes a lot of preemie quilts that she talks about over on her blog From the Magpie's Nest.


My crazy Christmas cactus is blooming. It does that sometime, blooming a couple of times in the winter. The Christmas cactus is one of those old fashioned plants. My mother's got several of them, some of which she's had for decades, and my grandmothers kept them too. They're hardy and this one really likes it in my kitchen near the window.

Photogenic Louie was happy to pose next to it, just to make the photo prettier.

Enjoy your weekend.
When you sew remember to make a few pillowcases for soldiers for Operation Pillowcase.

Saturday, March 06, 2010

Old and New

Since I'm easily distracted, I started a new project. The Alliance for American Quilts' contest this year is themed "New From Old," which is my favorite creative approach. The deadline for 16 x16 entries is May 31.


I'm working with a vintage handkerchief and a transfer from an old holy card. I'm going to use some of my vintage trims as well. Here you can see my silk ribbon spiderweb rose swag is studded with old pearls from a broken necklace. I threw in a few new ones too.


I remember buying this handkerchief at a garage sale in the 70s. I've always liked old things. This one is stamped with the original owner's name: Olive Welsh. I love that detail, and will make sure it shows.


I also made this apron, which is a hybrid from a few patterns. The pocket shapes are copied from an old apron that my grandmother wore. The Scottie dogs are reproduction fabric, but the pockets and sash are vintage fabric.

Don't you love that scallop?


And here are some lovely towels to match. If you'd like to win these and even more beauties, check the Operation Pillowcase site. There is a gift basket giveaway and all you need to do to enter is make a few pillowcases for soldiers serving in Afghanistan. We are currently collecting pillowcases for a unit of 500 soldiers, so we want to encourage lots of contributions. See the site for details.

Have a wonderful weekend. I'm so glad it's finally here.

Economy Block and Large-Scale Fabrics

Recenlty I decided to take out and use the stash of Asian-themed fabrics I'd set aside.  Many of them are large scale, so I wanted to fe...